Note: This is a classic reprint of an article from NEWS #025 October 1995.
Traditional Marquetry Cutting
Mike Williams
Marquetry, or the inlaying of patterns or "veneer pictures" into a ground has been practised for a number of centuries but the actual methods employed have evolved over time such that the craft of marquetry today bears little resemblance to the craft and methods used of yesteryear.
Nearly all traditional marquetry was cut with a very fine saw similar to a modern hand fretsaw in concept. The secret of good marquetry is the ability to cut through the veneers at exactly 90° for then the pieces will fit together with the most accuracy.
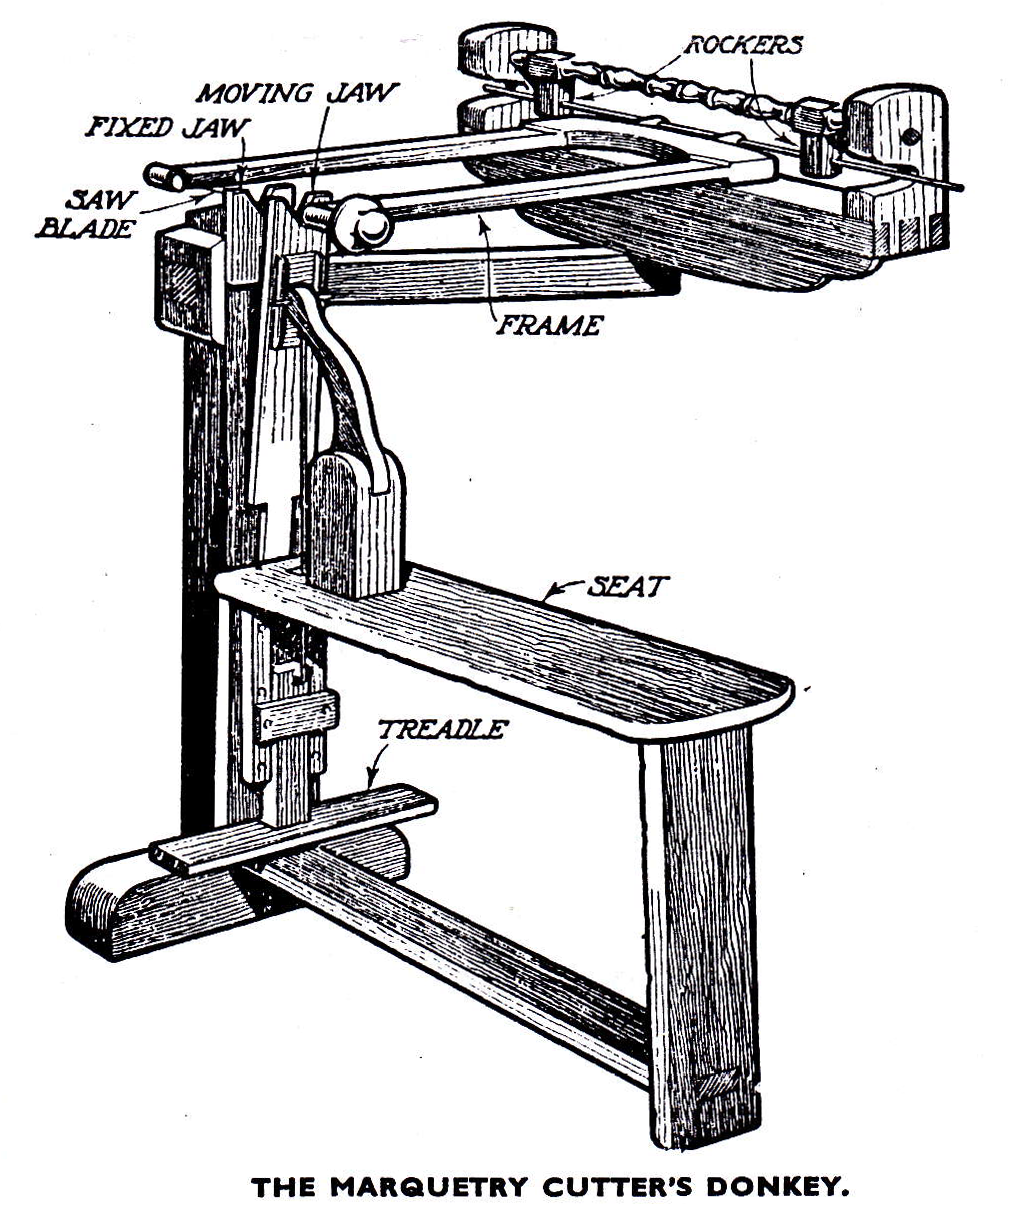
Sometime in the eighteenth century, the concept of putting the saw frame into guides was developed and this ensured that the cut would be at the ideal 90°.
 The whole device was known as a marquetry cutter's donkey because the operator sat astride it and operated a workpiece clamp or “chops” with his foot.
Because of the fineness of the veneers, at least three to four layers plus two outer waste layers had to be cut in one operation. In practice, as many layers were used as were different types or colours of wood and hence a number of patterns and “counter” patterns could be assembled from the jigsaw of pieces. Often, one or two layers of waxed paper were introduced into the packet to act as a lubricant for the fine saw blade. It is said that professional marquetry cutters made their own ultrafine saw blades from broken watch springs and this might be a topic for research in itself.
In order to transfer the pattern from an original piece of paper or linen to the piece to be glued to the veneer “packet”, the original was pricked with a machine similar to the reciprocating action of a modern sewing machine. Bitumen powder was dusted or “pounced” through this pricked pattern onto the copies and when heated, caused a fine brown stain of the design to be visible.
In early marquetry, the grave for the inlay was cut separately but it was discovered that by cutting the ground veneer simultaneously with the pattern in the same packet, almost perfect registration could be achieved. Hence, early Tudor and Stuart marquetry may sometimes be observed not to fit the ground very accurately whereas eighteenth century marquetry, even though the design might be quite irregular fits perfectly as it has been cut together with the ground.
To provide “animation” to the assembled marquetry, the pieces are often shaded on the edges by dipping them for a few seconds in hot scorching sand. In the latter half of the eighteenth century, knife engraving of the marquetry pieces started to augment sand shading and even replace it to a certain extent. Towards the end of the eighteenth century, this technique gave way to penwork, black ink lining of the marquetry pieces between coats of shellac. This allowed an intricacy and sophistication of design which some people feel was a step backward from the earlier simple effects and designs achieved with merely cutting and sand shading.
If you wish to delve deeper into this fascinating topic readers can find a fuller account in such classic works as “The Gentle Art of Faking Furniture” by Herbert Cescinsky (now unfortunately out of print but sometimes available secondhand); “Practical Veneering” by Charles H. Hayward (in the same category unfortunately) and for a more modern text, David Hawkins' “The Technique of Wood Surface Decoration”.