I have owned a Mathieson No. 8 plough plane for many years. I have been left handed for many more.
This is my left handed tool story.

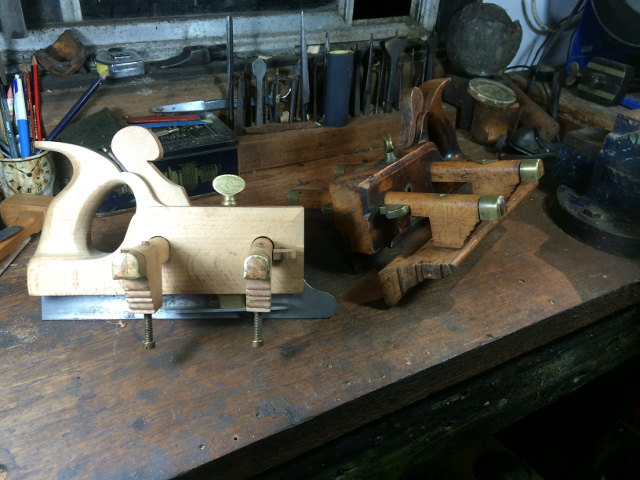 |
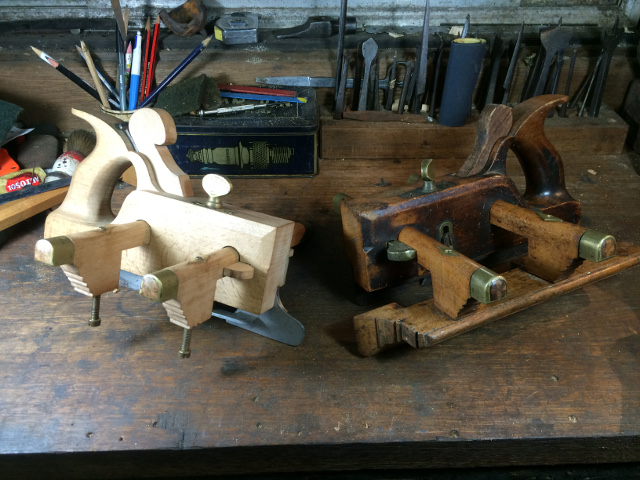
| Fig 1: Plough Planes |
I'd bought the plane ages ago long before I knew much about wood working or wood working tools. It was a great looking thing, grubby (well patinated?) but in fair shape. I had to have it. "Had to?" says the missus...
It was only when I got to my bench that I realised my error (don't tell the missus). It probably comes as no surprise that this product of the Victorian or maybe Edwardian era was a right handed tool... and I'm not right handed! Scissors, tape measures and now plough planes all plotting against me. I now had a tool that was next to useless to me unless I wanted to cross over to a life less sinister.
This was something I could never do, so I had a nice piece of useless beech in the cupboard.
Some years after that ill-advised purchase I started attending woodworking classes at the Splinter Workshops in St. Peter's under the tutelage of local designer and maker Paul Nicholson and former head teacher at Sturt, Stuart Faulkner. After the requisite cutting board, mallet, tray and box students could pursue their own special project.
I thought about my old plough plane sitting in the cupboard and wondered if I could make one, not just a copy but rather a mirror image. I was going to make a left handed plough plane!

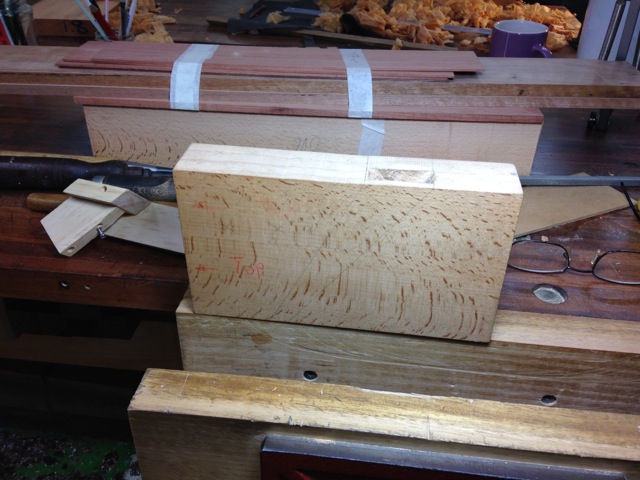 |
| Fig 2: Early days. A block of beech with a hole in it. |
I spoke to my teacher, Paul, about this. "Hmmmm. Ever made a plane before?" Nope. "Pretty complex, plenty to go wrong". Yep. "Think you can do it?" Dunno. "Let's see if you can." Ok! If I was going to undertake such a wood working journey this was the place to do it - sharp tools, great machine room and years of experience and knowledge around.
A trip to Anagote Timbers at Marrickville supplied me with a suitable block of European Beech and the next Thursday evening I was into it. As Paul had said it was a complex thing but until I started making a plough I never realised just how complex. So many holes! The thing is like Swiss cheese.
Too much? Too late now. I had to start.
American author and woodworker Chris Schwarz has said "measuring is the enemy of accuracy" and I took this to heart when laying out this job. I can't remember much measuring at all for this project. Most of my work entailed direct transposing of dimensions from the original albeit reversing a few for this kak-handed version. I made a template for the shape of the plane, then with dividers, straightedge, protractor and sharp pencil I drew on my design to the unsuspecting piece of beech.

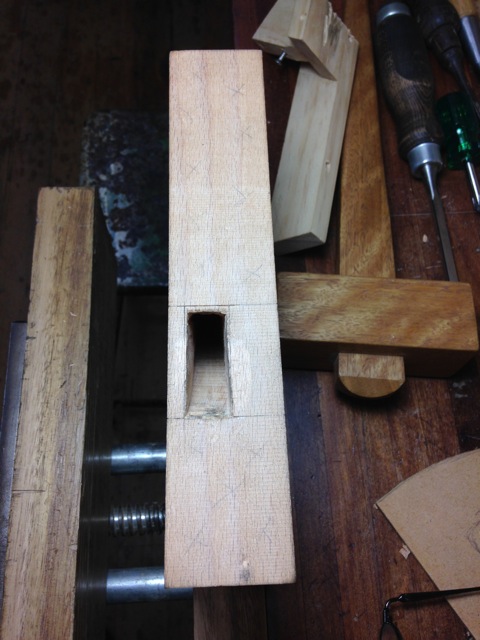 |
| Fig 3: The first mortise almost done. Only five to go... |
Much of the job was surprisingly straightforward though the numerous holes through mortises were to cause their own kinds of grief, especially the big one for the iron and wedge - a very deep angled tapered through mortise. I have cut many angled tapered mortises in the past mostly unintentionally due to poor technique but this one was the real deal and had to be right or the whole project would end up as a very fancy piece of firewood. I started by drilling out the mortise, an activity that had own set of complexities as I had to angle the table on the pedestal drill, clamp, unclamp then clamp as I drilled each hole and then turn it all over and work in from the other side because my bit wasn't long enough and, even if it was, the drill didn't have enough travel to bore to the depth I needed.
What had I got myself in for?

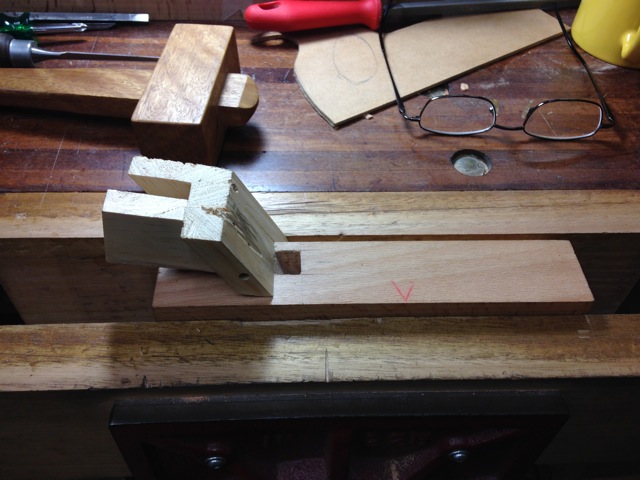 |
| Fig 4: An adjustable jig that I used when paring the front and back of the blade mortise |
Many of the details are hazy now as it has been some months since I started this odyssey but I do recall much frustration with the mortise. Once I had drilled out the thing I had to make it square. To start me off I had to rig up a rough jig to get my chisel cutting down into the abyss at the right angle. Of course the front of the mortise was a different angle to the back of the thing so I made my jig adjustable. I thought I was very clever.
It actually worked too! I took a leaf out of Bill Carter's idea book and ground a blunt edge on one of my chisels to make a scraper. The scraper worked very well, much better than the sharp paring chisel I had been using. Thanks Bill.

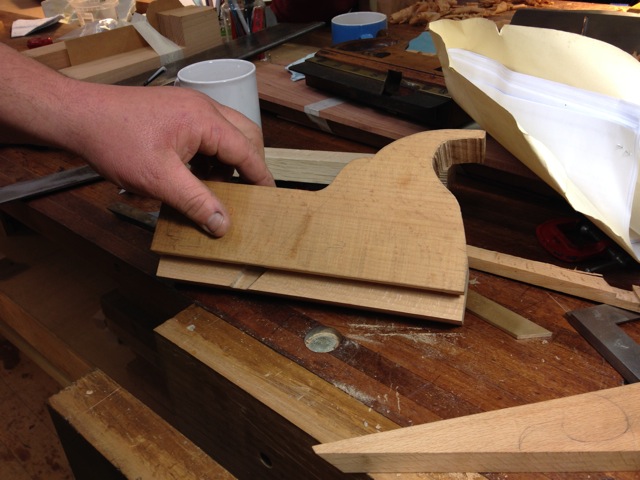 |
| Fig 5: Completed profile, rebate for skate is cut and the wedge is roughed out. |
Upon completion of the mortise I turned my attention to cutting out the profile of the plane. It has a tote and the blade sits in a nice groove up the front of it. As I marked out the profile I realised that I would be cutting away about half of the mortise I had been labouring through. Oh well at least that got rid of the rather ugly opening I had made. Big cuts were carefully executed on the band saw while smaller cuts were done by hand (and saw...). The tote is about 30mm wide while plane is over 40mm so with an old Ibbotson tenon saw I cut away some beech to create the offset tote.
Another crosscut was made to completely remove that block of waste and then it was time to start shaping. A couple of holes were bored with a Forstner bit and then with gouges and chisels, rasps and files I had something that looked and felt like a plane tote. I can strongly recommend the Gramercy Tools Saw handle makers rasp. It is a great tool for this job.

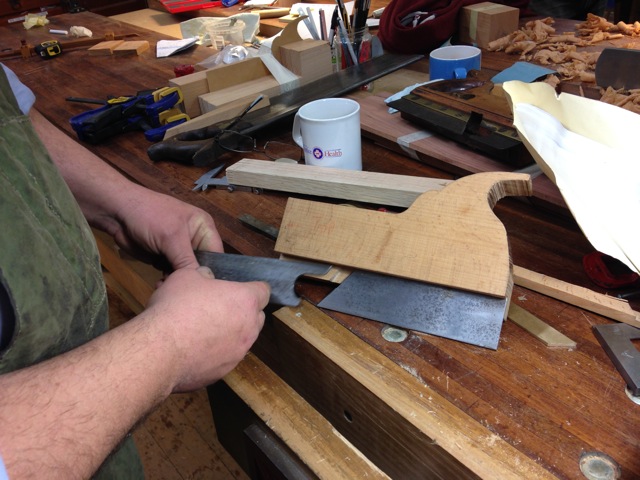 |
| Fig 6: With hacksaw, file and emery cloth the skate takes shape. The hard bit will be ensuring they remain aligned. A bit of mild steel from my dad's shed. Thanks dad. |
Of course this plane isn't just beech. It has quite a few metal fittings too. I scavenged some bits like the irons and the ferrules for the fence arms but I had to make my own skate and depth stop. I had hoped that these too could be cannibalised but as I found out these items are right handed. Back to the bench I went, pushing aside the woodwork and starting a bit of metal work. My dad, Frank, was a metalworker but I really hadn't done any since school. Like many parts of this project the fabrication of the metal components was yet another test of my hand skills.

 |
| Fig 7: A strip of brass finishes the rear part of the skate. |
I have no mill, power hacksaw, lathe or drill press so almost all of this work was done by hand. With hacksaw and file I cut to size, shaped and with the help of a breast-drill and ball peen hammer, even did my first ever riveting job. Brass needed to mate up with steel and matching holes drilled through. Super glue, double sided tape and clamps were all less than satisfactory and I was at my wits end. Hmmm, how did they do it on the original? I disassembled the old beast yet again and was pleasantly surprised to see yellow metal spots on the steel of the skate. Rivets! Of course! Why didn't I think of that? Because I'm a dill with no idea who thinks he can build a left handed plough plane. So I riveted and the pieces stayed together and my holes lined up. Another win!
A plough plane can cut grooves to a certain depth and this is controlled by the depth stop. This too had to be made. My hand tools were to be inadequate here so I went over to see my dad. I had made the pieces but hadn't the kit to get them together. Dad drilled, tapped and screwed and lo, we had a left handed depth stop. It was good to work with dad again and I think he enjoyed using his skills again. He's been retired now for nearly ten years and his hands are much softer now than I remember them as a kid but I could see he was back in the zone as soon as the smell of cutting fluid was in his nostrils.

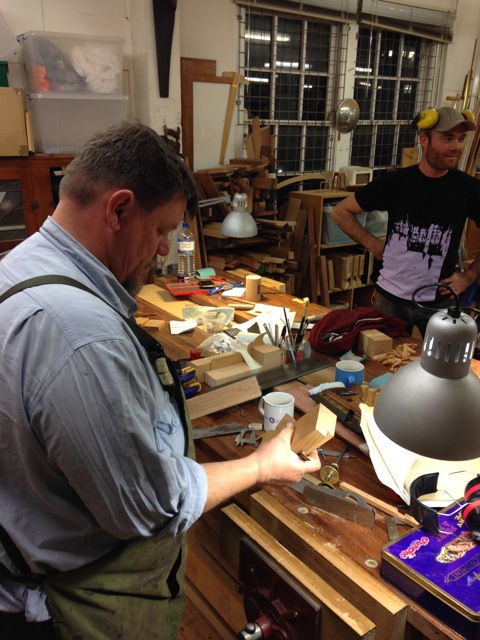 |
| Fig 8: "Now what?" I contemplate the challenge I have setmyself while one of our instructors laughs atmy misfortunes |
The depth stop slides up and down in another mortise (did I mention Swiss cheese?). This wasn't too hard. Scribe around the stop, drill outer ends and chisel out the waste in the waist, all the way through, or so I thought. Hang on, where were the escutcheon plate screws going to go? I had no more timber left as I had just made this mortise. Back to the original.
Ah ha. It wasn't meant to be a through mortise. Hmmm, pay more attention next time. Pare out the top of the mortise, drop in a plug, plane flush, drill through, pare out a bit more, let in the escutcheon plate. There goes another Thursday night. Oh well, all good experience.
The plough can cut to a variable depth now but it should also be able to cut its groove a variable distance from the edge of the board so work had to begin on the fence.
The fence is just a bit of straight timber parallel with the plane body but it doesn't just hang off a skyhook. Two arms were to be fashioned, replete with posts to which the fence is fastened and salvaged ferrules. The arms have rounded tops. I wasn't sure how to do them but I figured plane and abrasive paper would probably do the trick. Remove the corners and get some more facets. Take off the new edges and get even more facets. Eventually I was down to the point where I could not distinguish facet from edge. A brief set-to with abrasive paper and the arms were ready to receive the ferrules.
Fitting the ferrules was a trial. Someone had already used these items so I didn't have a great deal of spare material to shave off them for the perfect fit. I started carving down the end of one arm first with a saw and chisel and later a rasp, working around the stub, on the long grain. I didn't have enough control with these tools and so I tried a different approach. I pulled out a dirty great Dreadnought file from the cupboard and started down on the end grain. Safe edges on the tool meant I wasn't going to make my stub too narrow and I would stop at my saw cuts. The first one took ages but I think I had the last one worked down to size in about five minutes.
The ferrules were to be wedged in place, the wedges forming a cross on the ends of each arm. Like many parts of this no I didn't measure the size or angle, I simply worked each piece until it looked right and it fit. Unlike the rest of the plane the wedges were made from oak. I took the oak from the old but now derelict family dining table that had been brought out from Holland when dad and his folks left the old country in 1952. I'm not a hoarder, honest, I just hate to see good timber go to landfill...
I split them out with my penknife and fashioned them with a chisel against a bench hook until they looked like wedges. Two fine saw cuts were made before I slipped the loose ferrule over the stub and the inserted the wedges. Tap tap tap, SNAP! Bugger! Try again. Yes! There's one. Only eleven more……..

 |
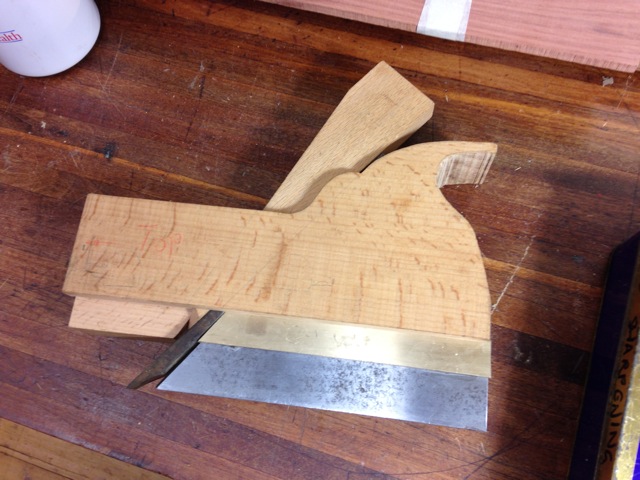
| Fig 9: The original Mathieson No8 (at right) and its mirrored twin. No, it's not ivory. The new beech looks so bright next to the well patinated (filthy?) beech of the original. |
More holes! The arms only work if they can pass through the body of the plane. The fence arms have a "tombstone" shaped cross section. Gouges? Hollow Chisel mortiser? Eventually I decided upon my method of attack. Out came the Forstner bit again. Two very neat holes and then I squared the bottom with a chisel. Careful placement and good tap to "stake in" and then, with the openings well defined I was able to whale in and clear out the waste with some heavy chiselling. A bit of judicious paring and a little filing and I had two mortises of fair condition through which the arms of my yet to be constructed fence could now pass.
As I type I am thinking about the closing stages of construction of this sinister abomination. A set screw to hold the depth stop in place has to be made. It travels within a small brass frame that needs to be let in to the side of the plane as a sliding dovetail. That's going to be fiddly. I also need to complete my fence. One edge needs to be flat, parallel with the plane, the outside however is quite fancy with an extensive bit of moulding. I have a router but no bits and after reading Matt Bickford's "Mouldings in Practice" I want to have a go with some hollows and rounds.
Like my router bit collection my hollow and round plane collection is pretty thin too so it might be a while before this thing is complete. It is, however functioning and I am happy to say, for a first effort at plane making, it's not too bad. In fact, I'm going to be so bold as to say it's the best left handed copy of a Mathieson No8 plough I have ever seen!